

How to create an ITI Branded email for your region
Take control of the message sent to your region by creating your own! We now have a process for you to build the newsletters that will be sent to your region. With our new process, you are in complete control of the content divers and members receive in their inboxes. In this post, we’ll walk you through a step-by-step guide of how to create a branded email using BeePro.
Step 1: Log in to BeePro using the Regional Office Account.
You will be able to get the login credentials you need from your Regional Manager. Once you are logged in, you will be prompted to select an organization. There should only be one to choose from titled “International Training.” See the screenshot below for clarification.

Step 2: Select the “RO Emails” Project
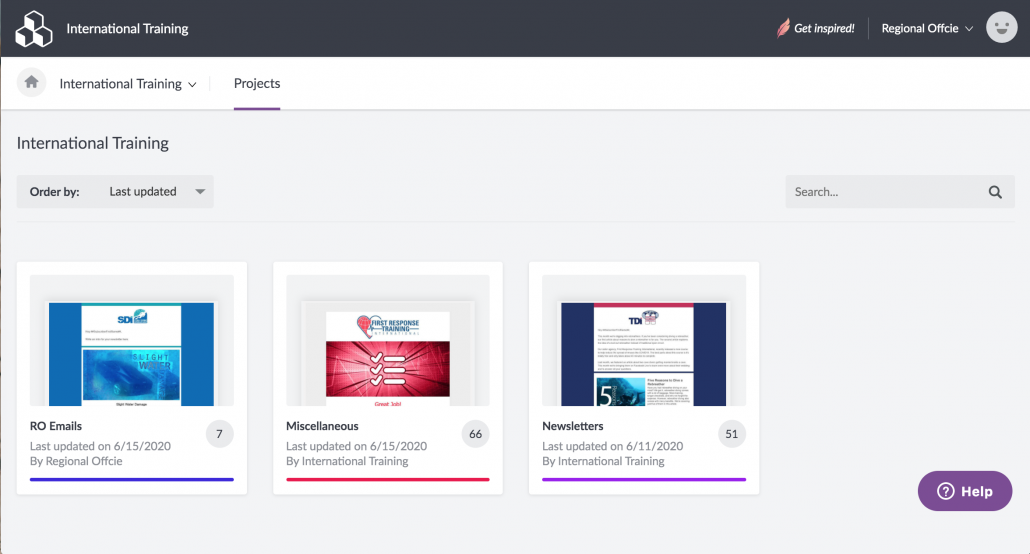
Once you have entered into the International Training Organization in BeePro, you’ll see three “Projects.” The one you need is titled “RO Emails.” Click on this project to open it.
Step 3: Select your email template and COPY it to create your newsletter.
Once you open the “RO Emails” project, you will see email templates broken out by agency and one for Member’s News as well. To start creating your own email, you’ll need to click on the downward pointing arrow as shown below.
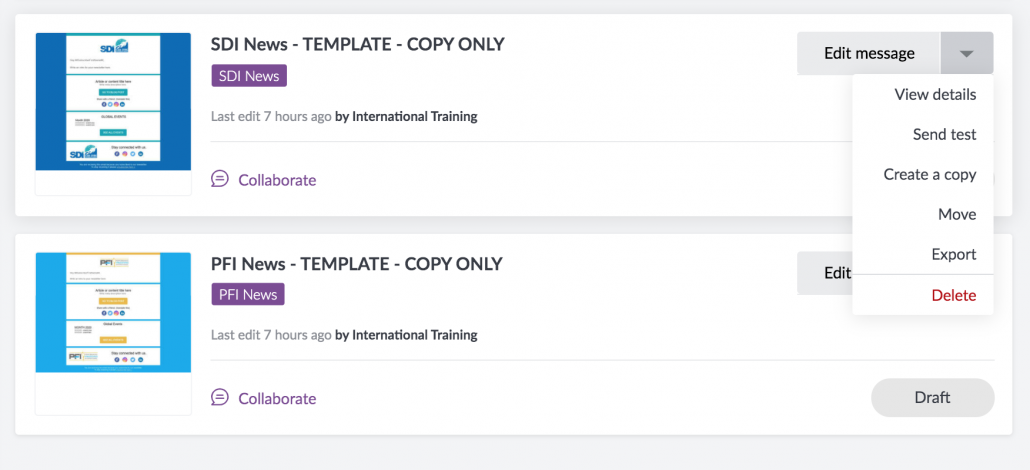
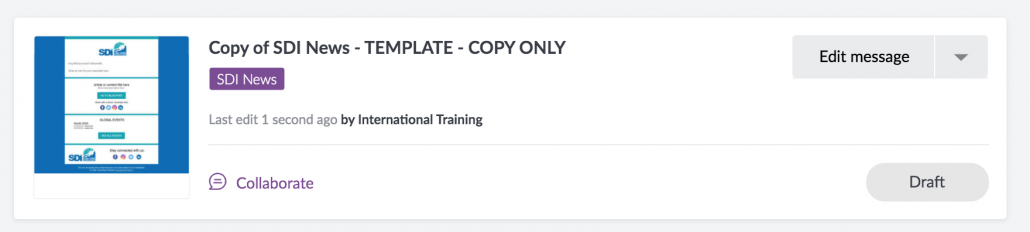
Select “Create a copy” from this menu. A new email will appear at the top of the list titled “Copy of (Agency) News – TEMPLATE – COPY ONLY” as shown below.
Step 4: Start editing your email details
Now you’ll need to rename your email. To do this you’ll click on the down arrow again and select “View Details.” This will take you to the screen shown below.

Next, you’ll click the pencil icon to the right of “Copy of [Agency] News – TEMPLATE – COPY ONLY.” This will allow you to edit the name of your newsletter. Deleted “Copy of” at the beginning, then replace “TEMPLATE” with the name of your region and “COPY ONLY” with the month and year the newsletter will be sent. Finally, add your region in the “Tags” of the email so we will be able to easily sort the emails by region. Once you have completed this step, it should look like the image below.

Step 5: Add content to your email
Now that you’ve formatted the details of the email it’s time to add your content. Click “Edit Message” to get to the screen below.
Now you’ll be able to add content to your newsletter by adding as many rows as you need. To add a row you’ll select the “Rows” tab on the right side of the screen. From there you’ll see a menu at the top of that section where you’ll click to select “My Saved Rows” as shown below.
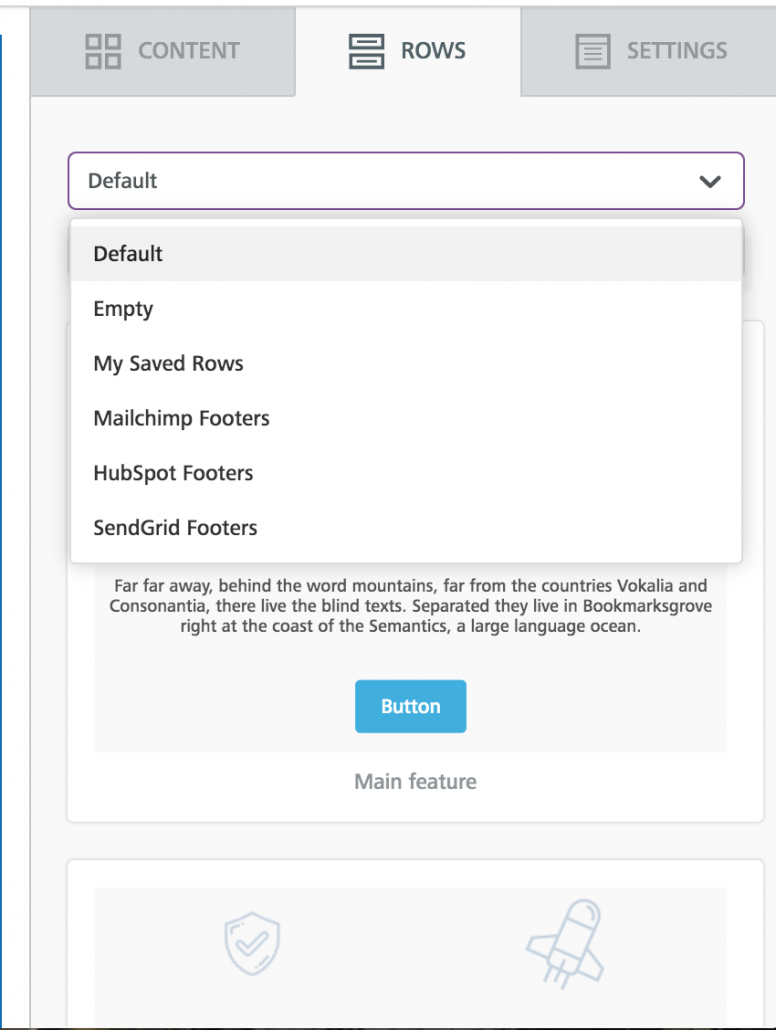

In this menu you’ll be able to add more rows based on agency. Scroll through the rows to find the one that matches the newsletter you are creating. Then drag and drop a new row into your newsletter as shown in the video below.
Now that you’ve added the number of rows you’ll need, you’ll work your way through the email, translating any English into the language of your region, adding images in the image sections, the titles, and descriptions of each piece of content, as well as links in all of the buttons and social sharing icons.


Step 6: Save and Export your email
Once you’ve completed your email. Click the “Save” button in the top right corner of the page. Then use the “Exit” button right next to it to get to the screen below.

On this page, you’ll click “Export” button to get your email in HTML code. When you click the “Export” button you’ll be prompted with this screen below.

Select “Copy the HTML” and you will see this:

Click “Download as an HTML file.” Now, rename with the same name you saved your email as in step 4.
Step 7: Submit your email to Marketing
Now you’ll fill out this form to submit your email to the Marketing Department for your email and subscriber list to be uploaded in our eNews system to be tested and sent to your region.